Taylor Timer Instructions: A Comprehensive Guide
Welcome! This guide provides detailed instructions for operating your Taylor timer, covering models 1478 and 532, ensuring accurate timing for cooking and beyond.
Understanding Your Taylor Timer
Taylor timers are renowned for their simplicity and reliability, making them ideal for a wide range of applications, from precise cooking to managing various timed tasks. These digital timers offer user-friendly operation with clearly labeled buttons for setting the desired duration and initiating the countdown. The core functionality revolves around accurately tracking elapsed time and alerting you with a distinct audible alarm when the set time expires.

Understanding the basic components is key. Most models feature a digital display showcasing the remaining time, along with buttons for setting minutes, seconds, starting, and stopping the timer. The alarm function is designed to be noticeable, ensuring you don’t miss critical timing cues. Familiarizing yourself with these elements will allow you to quickly and efficiently utilize your Taylor timer for optimal results in any situation.
Timer Models and Variations
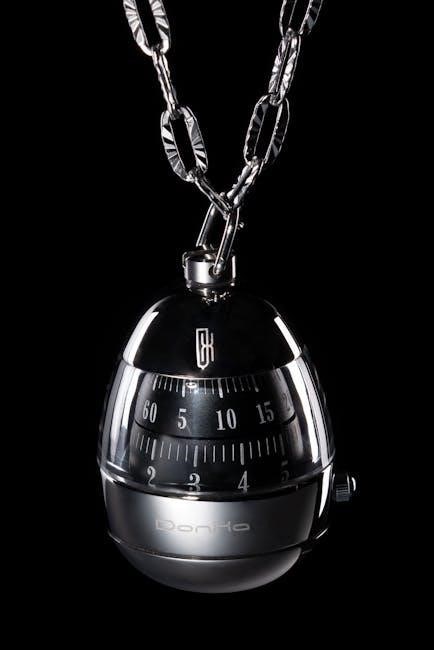
Taylor offers a diverse range of timers to suit various needs, but two popular models are the 1478 and the 532. The Taylor 1478 is frequently recognized as a food thermometer timer, often used for monitoring internal temperatures during cooking, alongside its timing capabilities. User reviews suggest an average rating of 6.5, highlighting its practical utility.
Conversely, the Taylor 532 is also categorized as a food thermometer timer, receiving a slightly higher average rating of 7.5 from users. While both models share core timing functions – up to 99 minutes and 59 seconds – they may differ in specific features like display size, alarm tone, or additional functionalities related to temperature measurement. Understanding these subtle variations allows you to select the model best aligned with your specific requirements and preferences.
Basic Operation: Starting and Stopping the Timer
Operating your Taylor timer is straightforward. To initiate the timing process, simply press the START/STOP button. This action activates the timer, beginning the countdown from the pre-set duration. The display will clearly show the remaining time. To temporarily pause the timer, press the START/STOP button again. This halts the countdown, preserving the elapsed time for later resumption.
To completely stop the timer and reset it to zero, press and hold the START/STOP button for a few seconds, or as indicated in your specific model’s instructions. This clears the timer, preparing it for a new timing cycle. Remember that a single press toggles between starting and pausing, while a prolonged press typically resets the timer entirely. Familiarizing yourself with this dual functionality ensures efficient and accurate timing.
Setting the Timer Duration
Adjusting the desired timing length on your Taylor timer is a simple process. Most models feature dedicated Minutes and Seconds buttons. Pressing these buttons incrementally increases the corresponding time value displayed on the screen. Continue pressing until you reach the precise duration needed for your task. Some timers may utilize a rotating dial or up/down buttons for finer control.
It’s crucial to understand that Taylor timers generally support timing up to 99 minutes and 59 seconds. Attempting to set a duration exceeding this limit will typically result in the timer resetting to zero or displaying an error. Always double-check the displayed time before starting the timer to ensure accuracy. Proper setting guarantees reliable timing for cooking, experiments, or any other application.
Using Minutes and Seconds Buttons
Operating your Taylor timer’s Minutes and Seconds buttons is straightforward. Each press of the Minutes button adds one minute to the set time, while each press of the Seconds button adds one second. The digital display clearly shows the accumulating time as you adjust it. These buttons allow for precise control, enabling you to set durations ranging from a few seconds to the maximum limit of 99 minutes and 59 seconds.
Remember to observe the display carefully while setting the time. A quick succession of presses can easily overshoot your desired duration. If this happens, simply continue pressing the buttons in the opposite direction to reduce the time. These buttons are the primary method for inputting the desired timing, ensuring accurate and reliable operation for various tasks.
Maximum Time Limit (99 Minutes, 59 Seconds)
Taylor timers are designed with a practical maximum time limit of 99 minutes and 59 seconds. This constraint ensures the timer remains focused on shorter-duration tasks, common in cooking, baking, and various timed activities. Attempting to set a duration exceeding this limit will result in the timer resetting to zero or displaying an error indication, depending on the specific model.
Understanding this limitation is crucial for effective use. For longer durations, consider utilizing a separate clock or timer. The 99:59 limit is a standard feature across many Taylor timer models, providing a balance between functionality and simplicity. It’s a reliable range for most everyday timing needs, preventing accidental excessively long countdowns.

Alarm Functionality
Taylor timers feature a clear and audible alarm to signal the completion of the set time. Upon reaching zero, the alarm will sound continuously until manually deactivated. The alarm’s purpose is to provide a reliable notification, ensuring you are alerted promptly, whether you’re in another room or engaged in other tasks. It’s a crucial component for accurate timing in cooking, experiments, or any time-sensitive activity.
The alarm’s volume can often be adjusted, allowing you to customize the sound level to suit your environment and hearing preferences. To silence the alarm, simply press the START/STOP button again. Understanding this functionality is key to effectively utilizing your Taylor timer and preventing missed notifications. Consistent alarm operation is a hallmark of Taylor’s quality.
Alarm Volume Control

Many Taylor timer models offer adjustable alarm volume, catering to diverse hearing abilities and environmental conditions. While specific controls vary by model, typically a dedicated button or switch manages the sound level. Some timers feature multiple volume settings – low, medium, and high – allowing for precise customization. Experiment to find the optimal setting for your needs, ensuring the alarm is audible without being disruptive.
If your Taylor timer has volume control, consult the model-specific instructions for its exact location and operation. A higher volume is ideal for noisy environments or individuals with impaired hearing, while a lower setting is suitable for quiet spaces. Properly adjusting the alarm volume guarantees you won’t miss crucial timing signals, enhancing the timer’s overall effectiveness.
Turning the Alarm Off
To silence the Taylor timer alarm, typically pressing the ‘START/STOP’ button once is sufficient. This action immediately halts the audible signal, preventing further disturbance. However, some models might require a prolonged press or a separate ‘ALARM OFF’ button, so referencing your specific model’s instructions is crucial. Ignoring the alarm won’t automatically stop it; manual intervention is always necessary.
Ensure the timer is fully reset after silencing the alarm to prevent accidental reactivation. A lingering display might indicate the timer is still active, even without sound. Familiarize yourself with your timer’s deactivation process to avoid confusion. Promptly turning off the alarm preserves battery life and prevents unnecessary noise, contributing to a smoother user experience.
Resetting the Timer
After the alarm has sounded and been silenced, or if you simply wish to start a new timing cycle, resetting the Taylor timer is essential. Typically, this involves pressing the ‘START/STOP’ button again after the alarm has been deactivated. This action clears the previous time setting and returns the display to 00:00, ready for a new duration input.
However, some models may require a separate ‘RESET’ button, or a combination of button presses. Always verify the correct procedure for your specific Taylor timer model. A complete reset ensures accurate timing for subsequent tasks. Failing to reset can lead to unexpected behavior or inaccurate timing during your next use. Proper resetting maintains the timer’s reliability and functionality.
Power Source and Battery Replacement

Taylor timers generally operate on battery power, typically utilizing AAA or AA batteries, depending on the model. The battery compartment is usually located on the back of the unit and secured with a screw or a sliding cover. To ensure consistent performance, it’s crucial to replace batteries when the display appears dim or the alarm volume decreases significantly.
Always use high-quality batteries from a reputable brand. Avoid mixing old and new batteries, or different battery types. When replacing batteries, observe the correct polarity (+ and -) as indicated inside the battery compartment. Dispose of used batteries responsibly, following local regulations. Regular battery checks and timely replacements guarantee uninterrupted operation of your Taylor timer.
Common Issues and Troubleshooting
If your Taylor timer isn’t starting, first ensure the batteries are fresh and correctly installed, observing proper polarity. A dim display often indicates low battery power. If the alarm fails to sound, verify the volume isn’t set to its lowest level and that the timer duration has been properly set. Sometimes, a simple reset can resolve unexpected behavior.
For unresponsive timers, try gently pressing the reset button (if available) or removing and reinserting the batteries. If issues persist, check for any physical obstructions around the buttons. If the timer freezes, a battery replacement is often the solution. Remember to consult the specific model’s instructions for detailed troubleshooting steps.
Timer Not Starting
If your Taylor timer refuses to initiate counting down, the most frequent culprit is depleted battery power. Begin by replacing the batteries with fresh ones, ensuring correct polarity – a reversed battery can prevent operation. A weak battery may display a dim screen, hinting at the issue. Confirm the START/STOP button is pressed firmly and that no other buttons are inadvertently held down.
Occasionally, a brief reset can resolve the problem. Try pressing the reset button (if your model has one) or removing and reinserting the batteries. Inspect the button itself for any physical obstructions. If the timer still won’t start, double-check the time is set to a valid duration; some timers won’t activate with a zeroed setting.
Alarm Not Sounding
When the Taylor timer reaches zero, but no alarm sounds, first verify the volume isn’t muted or set to its lowest level. Many models feature volume control buttons; ensure it’s appropriately adjusted. A completely discharged battery can also prevent the alarm from functioning, even if the display remains lit. Replace the batteries as a primary troubleshooting step.
Inspect the speaker opening on the timer for any obstructions like dust or debris. Gently clean it with a soft brush. If the alarm still fails, a reset might help. Remove and reinsert the batteries, or press any dedicated reset button. In rare cases, the speaker itself may be faulty, requiring timer replacement. Confirm the timer was properly set and started.
Specific Taylor Timer Models ⎻ Instructions
Taylor offers a range of timers, with models 1478 and 532 being popular choices. The Taylor 1478, often a food thermometer and timer combination, requires setting the desired time using the minute and second buttons, then pressing ‘Start’ to initiate the countdown. Its instruction manual, available online, details specific food temperature guidelines alongside timing functions.
The Taylor 532, another frequently used model, similarly employs minute and second buttons for time input. Users report a generally intuitive interface. Online resources indicate an average user rating of 7.5 for the 532, highlighting its reliability. Both models share core functionality, but consulting the specific manual for each ensures optimal performance and understanding of unique features.

Taylor 1478 Instructions
The Taylor 1478 is frequently utilized as a combined food thermometer and timer. To initiate timing, first, use the ‘Minute’ and ‘Second’ buttons to precisely set your desired duration. Pressing the ‘Start/Stop’ button commences the countdown. The timer can measure up to 99 minutes and 59 seconds. To halt the alarm, simply press ‘Start/Stop’ again.
Beyond timing, the 1478 excels as a food thermometer. Insert the probe into the food, and the display will show the internal temperature. Refer to the included guide for recommended temperatures for various meats and dishes. A free downloadable instruction manual is available online, offering detailed guidance on both timing and temperature functionalities. User reviews suggest an average rating of 6.5, indicating generally positive experiences.
Taylor 532 Instructions
The Taylor 532 is primarily recognized as a precision food thermometer, but also incorporates timing capabilities. Setting the timer involves utilizing the ‘Minute’ and ‘Second’ buttons to input the desired countdown length. Initiate the timer by pressing the ‘Start/Stop’ button; the same button deactivates the alarm when it sounds. This model, like the 1478, supports timing up to 99 minutes and 59 seconds.
As a thermometer, the 532 provides accurate internal temperature readings. Insert the probe into the food to obtain a precise measurement. Consult the accompanying documentation for optimal cooking temperatures. A freely accessible instruction manual can be found online, detailing both the thermometer and timer functions. User feedback indicates an average rating of 7.5, suggesting a high level of user satisfaction with its performance.

Using the Timer for Cooking
Taylor timers are exceptionally useful in the kitchen, ensuring perfectly cooked meals. Begin by setting the desired cooking time using the minute and second buttons. For recipes requiring precise timing – like boiling eggs or simmering sauces – the timer’s accuracy is invaluable. Initiate the timer just as you begin the cooking process.
When the alarm sounds, it signals that your dish is ready. This prevents overcooking or burning, preserving flavor and texture. Whether baking, roasting, or simply timing a quick sauté, the Taylor timer provides peace of mind. Remember to reset the timer after each use to prepare it for the next culinary task. Consistent use will elevate your cooking experience.
Using the Timer for Other Applications
Beyond the kitchen, a Taylor timer proves remarkably versatile. Utilize it for timing workouts, setting intervals for study sessions, or managing tasks throughout the day. Its clear display and audible alarm make it ideal for tracking durations in various scenarios.
Consider using it during board games to limit turns, or while brewing tea to achieve the perfect steep time. The timer can also assist with household chores, breaking down larger tasks into manageable, timed segments. Its portability allows for convenient use anywhere – from the office to the classroom. Embrace its adaptability to enhance productivity and organization in all aspects of life.
Cleaning and Maintenance
To ensure longevity and optimal performance of your Taylor timer, regular cleaning is recommended. Wipe the exterior with a slightly damp, soft cloth. Avoid abrasive cleaners or harsh chemicals, as these can damage the surface and potentially affect the timer’s functionality.
Do not immerse the timer in water or any other liquid. For stubborn stains, a mild soap solution can be used, followed by a thorough wipe with a clean, damp cloth. Ensure the timer is completely dry before resuming use. Battery leakage can cause corrosion; promptly replace depleted batteries to prevent damage. Proper care will maintain accuracy and extend the life of your Taylor timer.
Safety Precautions
Always exercise caution when using your Taylor timer, particularly in cooking environments. Keep the timer away from direct heat sources, such as stovetops or ovens, to prevent damage or malfunction. Do not attempt to disassemble or repair the timer yourself, as this could pose a safety risk and void the warranty.
Supervise children when the timer is in use, and ensure they understand its proper operation. Avoid dropping the timer, as this can cause internal damage. If the timer exhibits any signs of damage, such as a cracked casing or malfunctioning buttons, discontinue use immediately. Replace batteries promptly to avoid potential leakage and corrosion. Prioritize safety for reliable performance.
Frequently Asked Questions (FAQ)
Q: My timer won’t start. What should I do? Ensure the battery is correctly installed and has sufficient charge. Try resetting the timer. Q: The alarm isn’t sounding. Verify the volume isn’t muted and the battery isn’t depleted. Q: Can I use this timer for freezing applications? Taylor timers are primarily designed for cooking and timing tasks; use caution with extreme temperatures.
Q: What is the maximum time I can set? The maximum duration is 99 minutes and 59 seconds. Q: How do I reset the timer? Simply press and hold the start/stop button. Q: Where can I find more detailed instructions for my specific model? Refer to the model-specific sections within this guide.
Where to Find Additional Support
For immediate assistance, consult the comprehensive online resources available at the official Taylor Precision Products website. You’ll find downloadable manuals, troubleshooting guides, and frequently asked questions tailored to various Taylor timer models, including the 1478 and 532.
If you require direct support, contact Taylor’s customer service team via phone or email. Their contact information is readily available on their website. Online communities and forums dedicated to cooking and kitchen gadgets can also provide valuable insights and user-shared solutions. Remember to specify your timer model number when seeking assistance for faster and more accurate support. Explore Nexus modding communities for potential software-related help.
Warranty Information
Taylor Precision Products typically offers a limited warranty on their timers, covering defects in materials and workmanship for a specified period from the date of purchase. The standard warranty duration is often one year, but it’s crucial to verify the exact terms applicable to your specific Taylor timer model – 1478 or 532 – by reviewing the documentation included with your product.
The warranty generally does not cover damage resulting from misuse, accidents, or unauthorized repairs. To make a warranty claim, retain your proof of purchase and contact Taylor’s customer service department. They will guide you through the process, which may involve returning the timer for inspection or replacement. Please note warranty conditions can vary, so always consult the official warranty statement.
Timer Display Explanation
The Taylor timer’s display is designed for clear readability, showing the remaining time in a digital format. Typically, the display features large digits indicating minutes on the left and seconds on the right. When the timer is running, these digits count down towards zero. Some models, like the 532, may include additional indicators.
A colon (:) usually separates the minutes and seconds. When the alarm is active, the display might flash or show a specific icon to alert you. Pay attention to any low battery indicators, which signal the need for replacement. The display will show “0:00” when the timer reaches zero, triggering the alarm. Understanding these visual cues ensures effective timer operation.
